By Andrew Liszewski
I made mention of it a couple of weeks ago, but unless you’re an IT type who hasn’t been completely demoralized by the job, it’s really hard to get excited about wireless routers. In fact, I think I’d be more eager to research and shop for washing machines and dryers than a wireless router. But in an age of laptops, iPads and other portable devices, a wireless router is pretty much a must-have accessory for any home with internet access.
But given how tech illiterate the majority of the world’s computer users are, a wireless router can be a nightmare for anyone who serves as the unofficial tech support for their friends and family. Thankfully someone, somewhere at Cisco has suffered the same fate, and as a result the company has done quite a bit to make the latest generation of their wireless routers extremely user-friendly. After playing with a couple of their models for the past week I would be completely confident in handing my parents one of these routers and then walking away, knowing that I wouldn’t receive a single tech support phone call while they set it up and got it running. And if you’re curious just how easy Cisco has made the setup process, you can check out my full review after the jump.
Cisco Valet Plus M20
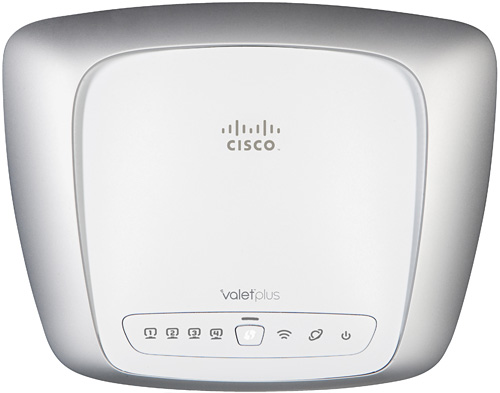
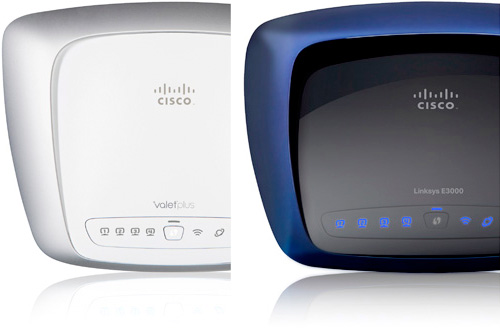
When it comes to being user-friendly and consumer oriented, the Valet Plus M20 is definitely the model most people will want to consider. In fact, the Valet Plus’s box doesn’t even include the term router anywhere on the packaging, and they’ve left the M20 moniker off as well so it doesn’t appear to be too intimidating. Cisco has even gone with a calming white and gray color scheme on the router itself which should appeal to consumers who have become accustomed to user-friendly i-products.
As for the hardware and tech specs, the Valet Plus M20 is a Wireless-N 2.4 GHz router with 4 gigabit ports on the back and a streamlined design that sees the antennas hidden inside the housing, instead of sticking out the back like pair of outdated rabbit ears. Now I don’t have the facilities to test if that limits the router’s range much, but I didn’t notice any less performance than the D-Link router I’ve been using for the past year. Most importantly though when it comes to the hardware, the Valet Plus M20 comes with what Cisco calls the ‘Easy Setup Key’ which is a big part of its ease of use.

Now the Easy Setup Key is really nothing more than a USB flash drive that comes pre-loaded with the company’s Cisco Connect software, but in an age of optical driveless netbooks, I think it’s a far better solution than an install disc for a few reasons that will be addressed later. And even before you plug the Valet Plus in, a warning sticker on the back of the router recommends that you connect the Easy Setup Key to your computer since it walks you through every step of the setup process.
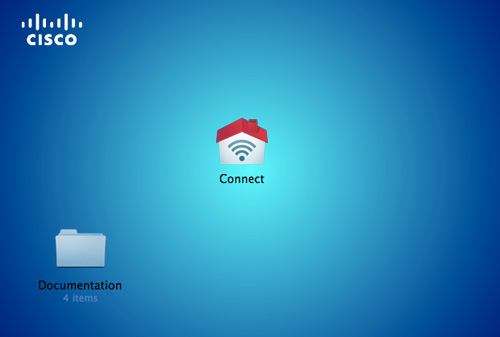
My testing was done on a MacBook, though the Valet Plus and Cisco Connect software of course works with PCs running Windows XP SP3 or later. So when you plug the Easy Setup Key into a Mac, the first thing you see is this contents screen which lets you launch the Cisco Connect software.
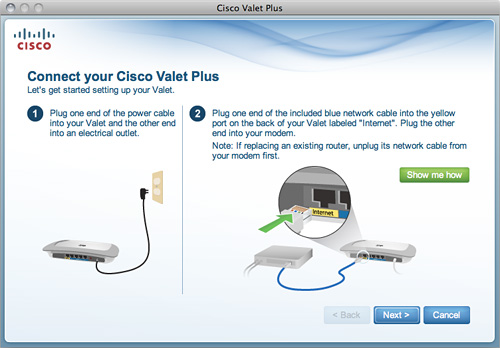
You’re then prompted to power up the router and connect it to your modem, and even though everything is clearly labeled on the back of the router, there’s still an additional guide available here if you think you need some extra help. But once you’re certain everything is connected correctly you hit next…
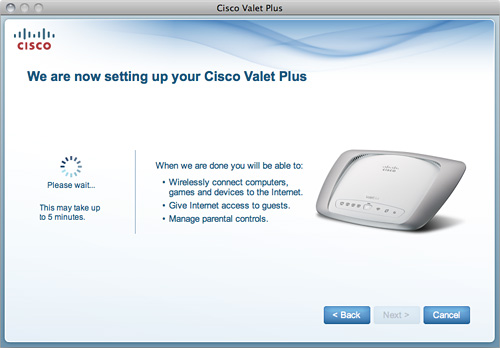
…which brings you to this ‘We are now setting up your Cisco Valet Plus’ screen which you’ll have to stare at for up to 5 minutes. I think my setup took around 3, which is hardly an inconvenience. But if you get bored you can go play some Not Tetris while you’re waiting.
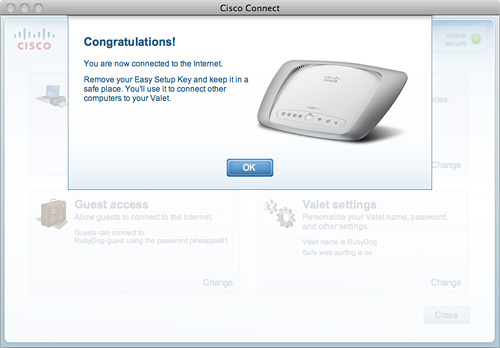
Now assuming everything went as planned, like it did for me, you’re given a ‘Congratulations’ dialog telling you to disconnect the Easy Setup Key and stash it somewhere safe. During the setup process the Cisco Connect software was automatically copied to my Applications folder so using it to configure other options later on doesn’t necessarily require the flash drive, unless you make changes. And believe it or not, at this point the router is completely setup. Security, passwords, names, the whole nine yards, and since the router’s settings are copied back to the flash drive during the setup process, connecting additional PCs to your wireless network is once again as easy as just inserting the Easy Setup Key into another system.
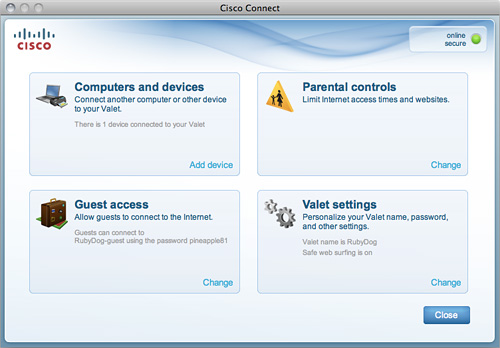
But just because the initial setup process was a relatively hands-off procedure doesn’t mean the router is completely inaccessible in terms of options or customization. Not at all. After the setup process is complete, and whenever you run the Cisco Connect software again, you get this screen which provides some basic, though very useful, options.
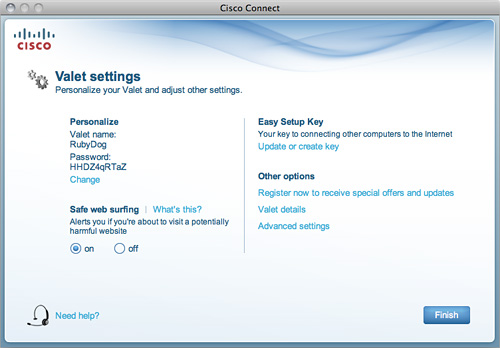
The ‘Valet Settings’ in the lower right will probably be the first place more technically inclined people head since it allows you to change your wireless network’s name and password. The network that was automatically setup during my testing was called ‘RubyDog’, which is unique and easily recognizable if you happen to live in a sea of wireless networks. And while the Easy Setup Key in theory means you never need to manually type in a network’s password again, there’s no USB port on most handheld devices like the iPhone, iPad or the Nintendo DS. So if you’re not happy with the complicated, though secure, random password you were assigned, you can easily change it here.
In the ‘Valet Settings’ you can also turn off ‘Safe web surfing’ which is on by default, and I assume it simply turns off some of the routers more strict firewall functionality. And if you do decide to change your network’s name or password, it’s going to affect any computers connected to your wireless network, so instead of re-entering the information on those other systems manually, you can simply update the Easy Setup Key in here so your changes can be easily applied.
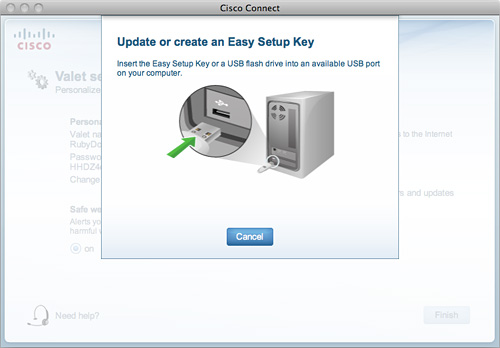
And if that Easy Setup Key ever happens to go missing, you can easily create a new one by just plugging in a 1GB+ flash drive of your choosing.
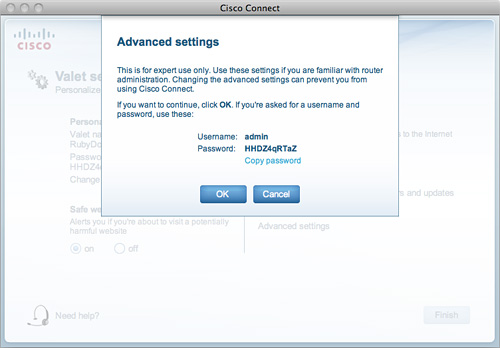
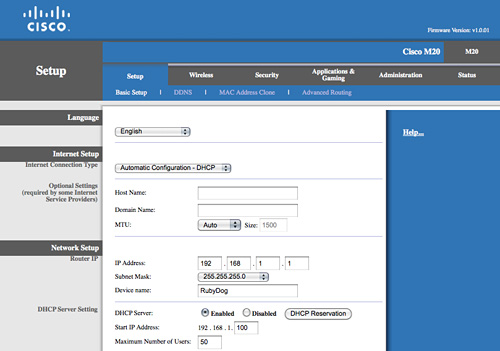
But if you do happen to be the type with IT tendencies, you needn’t have to worry about the Valet Plus being neutered if you wanted to really tweak it out. Hitting the ‘Advanced Settings’ link in here will send you over to the router’s internal 192.168.1.1 browser-based settings pages, where you can mess around with the advanced settings ’til your heart’s content.
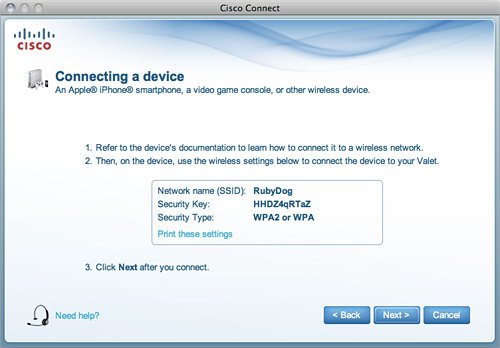
Now like I said earlier, that Easy Setup Key makes life a breeze if you happen to be connecting a PC running OS X or Windows to your wireless network. But if you’re trying to connect a device running something else, or one that’s lacking a USB port, then you’ll have to go the old fashioned route and manually type in the security password to gain access. For most devices like cellphones or tablets it’s not that hard to simply walk over to a computer and read the password off the screen, but if that’s not feasible you can quickly print off the security details for your network here, you’ll just want to make sure to thoroughly dispose of that printout afterward.
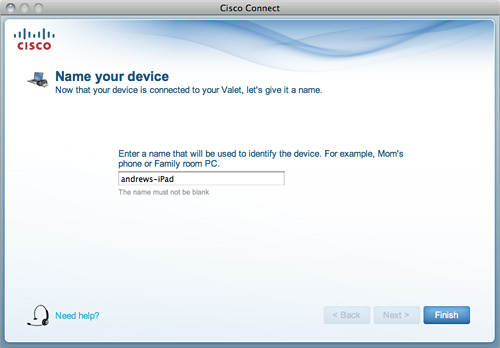
And when any device is connected to the Valet Plus you have the option of giving it a unique name to make it easier to identify, but also so you can setup specific options on a device by device basis.
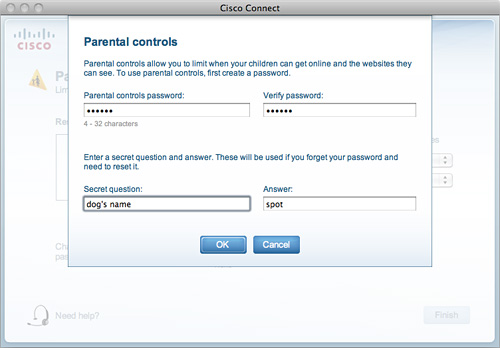
What kind of device-specific options? Well if you have kids you’ll probably be interested in the Valet Plus’s ‘Parental controls’ which are accessible from the Cisco Connect software’s main page. The first time you access these ‘Parental controls’ you’ll need to setup a password and a security question, so make sure you get there before your kids do, otherwise you’ll probably find yourself locked out and reaching for the router’s hardware reset button.
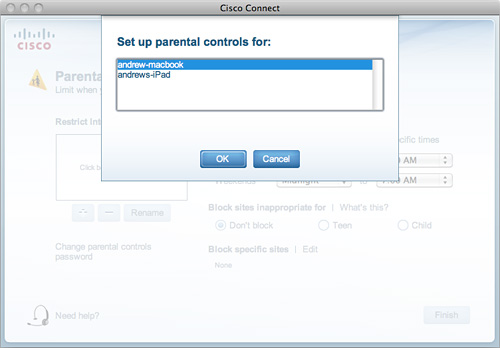
If you don’t already have any devices setup for ‘Parental controls’ you’ll need to select one from your list of currently connected devices, and that’s why it’s probably not a bad idea to give each one a unique and easily identifiable name.
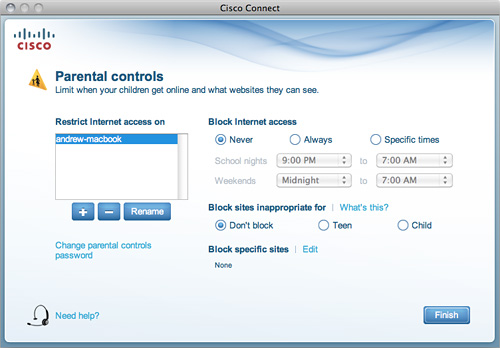
The ‘Parental controls’ allow you to completely block internet access on a given device or setup custom schedules so your kids can only be online while you’re at home, or after their homework is done etc. You can also block a list of pre-determined inappropriate sites which is more strict or less strict depending on whether you select the child or teen options.
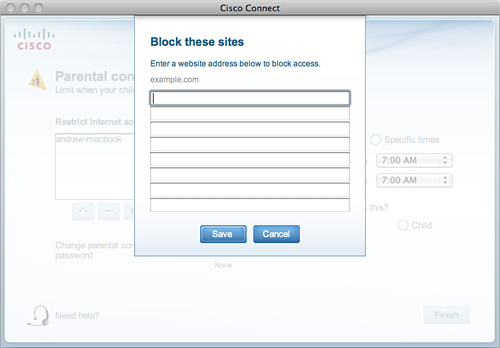
Of course it’s impossible to block everything you don’t want your kids to see online, but if there’s someplace you deem inappropriate that’s still accessible you also have the ability to block custom sites as needed. It’s no excuse for proper adult supervision, but I’m sure it provides a bit of extra peace of mind since you don’t want to continuously hover over your kids until they leave the house at 18.
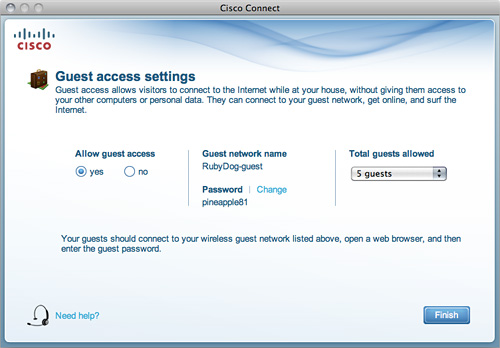
The feature I find most appealing though, besides the reduced tech support calls of course, is the ‘Guest access settings.’ I don’t exactly know why, but I HATE giving out my wireless network password when friends visit. I know they probably won’t do anything nefarious while I’m there, but there’s just something about telling someone else one of your passwords that doesn’t sit right with me. But that’s not an issue with the Valet Plus since by default when your main wireless network is created, a guest network is created alongside it. Since my main network was named ‘RubyDog’ the guest network was named ‘RubyDog-guest’ so it’s pretty easy to tell them apart. And I like that a random, though easily sharable password is also automatically generated for you. I’d much rather tell my friends to type in ‘pineapple81’ than ‘Xbry45Dh7tYy’. But again, you can also change it if you want something else.
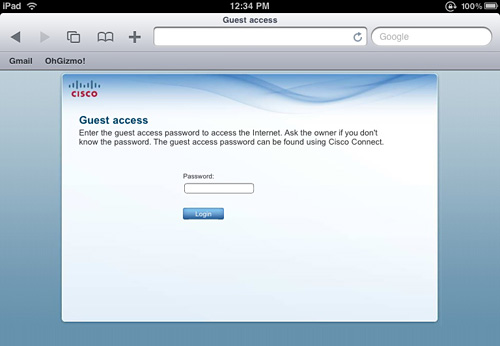
And when a visitor connects to your network they simply have to choose your guest network where they’ll be automatically taken to a login screen like what you’d find in an airport lounge. I’m not sure if it’s easier than the standard wifi password prompt, but I think it makes your home network seem a lot slicker. Now if only the software included a means to accept credit card numbers and charge your friends outrageous fees for internet access by the hour.
Cisco Linksys E3000
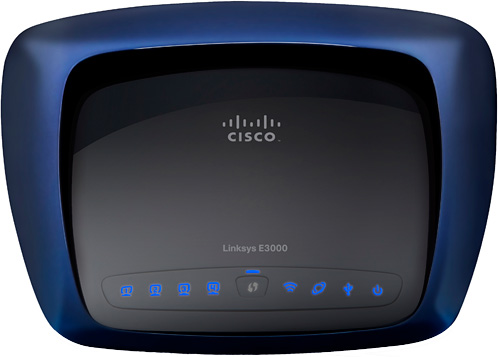
Now where the Valet Plus M20 was designed to appeal to the average consumer looking to install a wireless network in their home, the Linksys E3000 is targeted towards those who know why the letter ‘N’ is important, and get excited, not intimidated, by terms like ‘dual-band’.
When it comes to the hardware and tech specs, besides a sinister dark blue and black housing (no doubt a carryover to appease longtime Linksys fans and users) the E3000 is also a Wireless-N router but with dual 2.4 GHz and 5 GHz bands, three internal antennas for a larger coverage area, 4 gigabit ports on the back as well as a USB port for file and media sharing and a built-in UPnP AV media server.
In fact the only thing it lacks when compared to the Valet Plus is the included USB Easy Setup Key. Instead, it only comes with an install CD, which like I mentioned earlier, can actually be a problem for netbook or MacBook Air users which both lack an optical drive. The Easy Setup Key included with the Valet Plus was only 1GB in size, so it’s not like not including one with the Linksys E3000 was a cost-saving measure, so I’m just going to assume they figured the average user interested in the E3000 wouldn’t have a need for it, though I’d completely disagree with that. However, it doesn’t mean you can’t create your own as you’ll see in a minute.
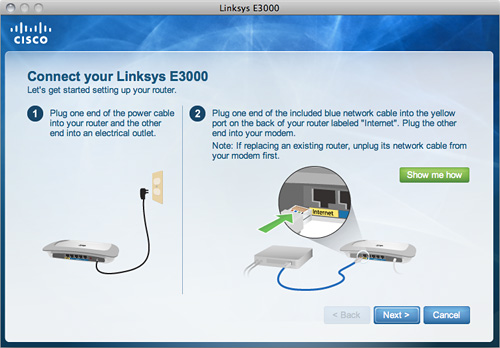
The setup process using the Cisco Connect software is nearly identical to the one for the Valet Plus, though the graphics do appear to be a bit more color coordinated to the E3000’s black and blue housing. So at least Cisco pays attention to details. You basically wire it up the exact same way as instructed, and hit next.
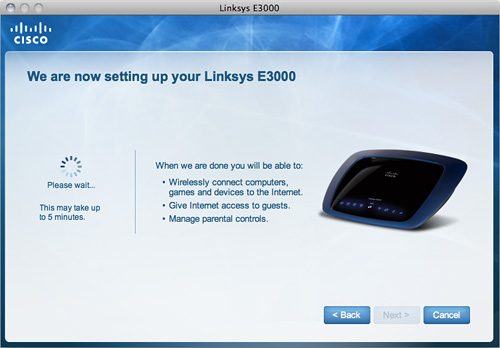
If everything goes as it should during the 4 or 5 minute setup process your wireless network is once again good to go with a randomly generated network name and password. If you’re curious, this time around my network was named ‘BronzeCheetah’ which is oddly enough the same nickname I had in high school. What a coincidence!
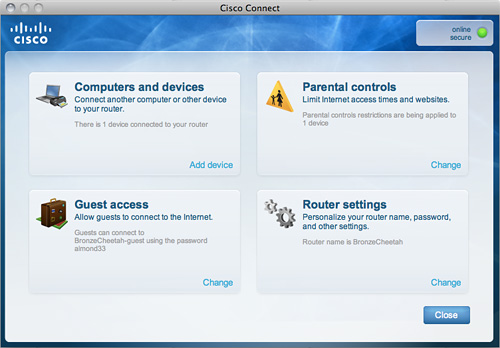
As for the various options on the Cisco Connect main screen? Well they’re nearly identical to what you get with the Valet Plus. However, I did find one minor difference.
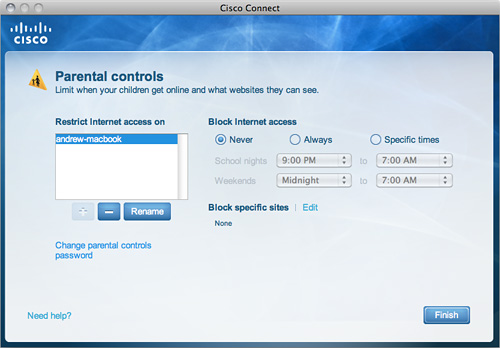
When you visit the ‘Parental controls’ section for the E3000 you don’t have the option to block inappropriate sites for specific age groups. You can still block sites on a site-by-site basis, but those general options don’t exist. Again, just because the E3000 might be targeted towards power users, that doesn’t mean these options won’t still be handy. So hopefully in future versions of the Cisco Connect software this option will be included for routers under the Linksys brand as well.
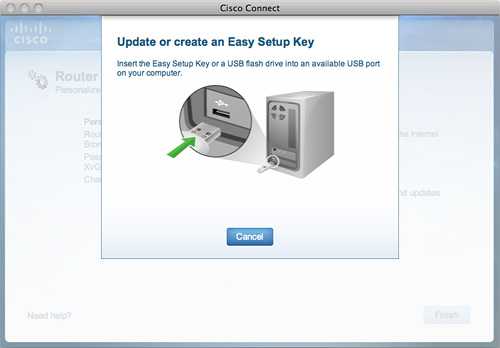
And finally, while I still don’t completely understand why the Cisco Connect software wasn’t included on a flash drive with the E3000, since it makes connecting other PCs to the network a heck of a lot easier, you can still create your own if you have an old 1GB flash drive kicking around that you can dedicate to the cause.
Conclusions:
I’m going to be really honest here for a second. My first wireless router, many many years ago, was a Linksys that actually caused me nothing but grief for quite for some time. And when I finally replaced it with a different brand it met a most appropriate death not unlike the printer from Office Space, and I vowed to never buy or recommend a Linksys product ever again. What can I say? I try to keep an open mind when it comes to technology and electronics, but everyone has their own preferences, opinions and experiences when it comes to specific brands or hardware. And my experience with Linksys was not amazing.
But that was before the brand was purchased by Cisco, and I can officially say now that thanks to this review Linksys, and the company’s new Valet brand, are back in my good books. While I don’t necessarily mind serving as my family’s primary source of technical support, I’ve always found wireless networking issues to be the worst thing to deal with. And like I said earlier, I would actually be quite confident to hand anyone either of these routers and let them have it. Even if it was the first wireless network they ever setup. Cisco has definitely impressed me with the ease of use of both of these routers, and even though part of the credit has to go to the modern operating systems, their software still makes setting up a wireless network and tweaking options incredibly easy, even for someone who doesn’t even know what IT stands for.
Pros:
+ Ridiculously easy to setup and the Easy Setup Key flash drive makes connecting additional PCs to your wireless network just as easy.
+ Parental controls let you limit internet access at certain times or block inappropriate sites on a device by device basis.
+ Guest network allows you to provide access to visitors for a limited time without divulging your main network’s password.
+ No external antennas on either model makes them easier to stash away.
+ Gigabit ethernet ports on both models and USB with a built-in UPnP AV media server on the Linksys E3000.
Cons:
– At $149 for the Valet Plus M20 and $179.99 for the Linksys E3000 they’re definitely not the cheapest routers on the market.
– The Linksys E3000 doesn’t come with an Easy Setup Key flash drive, though one can be created once everything is set up and running.
Links:
Cisco Valet Plus M20 – $149.99 ($129.99 CDN)
Cisco Linksys E3000 – $179.99 ($159.99 CDN)
If you have any questions about either of these Cisco routers you’d like answered, please feel free to leave them in the comments, and I’ll try to respond to them as best I can.


