 By Andrew Liszewski
While a truly ‘paperless office’ is still many years away, it seems a completely wireless one is almost within our reach. As long as you ignore the need for power cords, you can pretty much eliminate all the other wires through the use of cell phones, bluetooth and of course wifi.
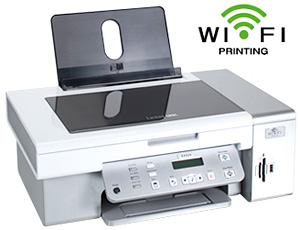
The latest devices to at least cut one of their cords are printers. Thanks again to wifi, those annoying and limiting parallel port, USB and network cables are a thing of the past. While I have seen wifi printers in stores before, Lexmark seems to be the first manufacturer to be really gung-ho about the idea, and have released an entire line of affordable wifi printers with no extra hardware or adapters needed.
I had a chance to look at the Lexmark X4550 All-In-One printer which is one of the company’s first wireless models. You can read my impressions and full review after the jump, or just look at the pictures if you feel you’ve already done enough reading for the day, I’ll understand.
Lexmark X4550 All-In-One Wireless Printer
Before I look at the printer, here’s a list of key specifications I harvested from the Lexmark website, which should give you a good idea of what this particular model is capable of.
Wireless:
– Built-in 802.11g wireless printing. Compatible with 802.11b.
Print:
– Up to 26 ppm black and 18 ppm color printing.
– Superior quality printing up to 4800×1200 dpi print resolution.
Copy:
– Reduction / enlargement capacity from 25%-400%.
– Up to 17 cpm black and 11 cpm color.
– 1-99 copies.
Scan:
– 48-bit color scanner depth; 16-bit grayscale.
Photo Printing:
– Print directly from digital memory cards slots, PictBridge(TM) compatible digital cameras or USB flash drive.
– Brilliant 6-color printing with optional photo cartridge.
You can find the complete list of features on the Lexmark website, but these are just a few key points that I would find important when researching a new printer. Now onto the hardware.
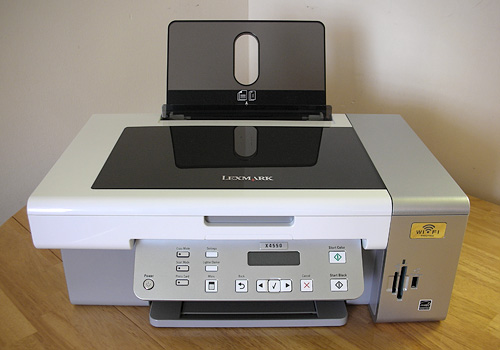
First off, I have to say that the X4550 isn’t going to win any awards when it comes to innovative design, but to be honest I don’t know why anyone would even buy a printer based on looks anyways. The grey and white color scheme is clean and simple and seems to be begging for a spot in the Apple Store’s printer section. So Mac users who insist on only buying peripherals that match their white or grey Macbooks should be happy here. Otherwise the printer looks like an all-in-one printer should, not much else I can say.
At the back you can see the printer uses a vertical paper feed tray, which I’m usually not a fan of. I find they’re good at collecting dust and funneling it down to the printer’s insides. But at the same time I’ll admit it does make swapping paper stocks a lot easier than with an internal tray. The paper also sits deep enough into the printer so that it doesn’t stick up over the top of the support.
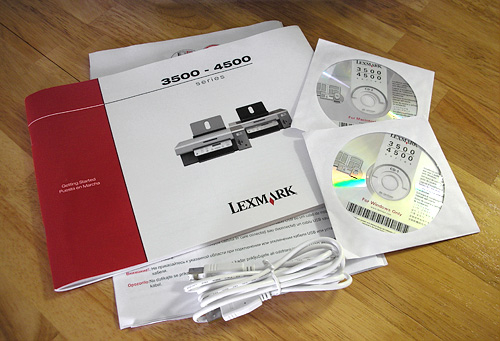
In addition to the printer itself, the X4550 also includes all the standard accessories one would expect including a printed manual, last minute warnings, a quick setup guide, separate installation CDs for both Windows PCs and Macs and a USB printer cable. Not pictured is a couple of ink cartridges to get you started printing right out of the box. Basically, all of the standard printer fare.
The manual is actually nice and large with plenty of pictures, but I noticed that the setup guide it included is also displayed while you’re installing the drivers and software on your PC. So if you’ve already got the printer up and running using the printed manual, you’ll need to click through every single step again while you’re installing the software. A minor annoyance but I thought I’d mention it.
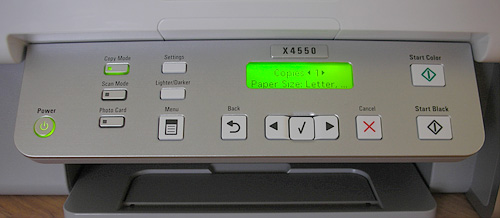
On the front of the printer you’ll find the control panel, and as you can see it’s slightly angled down, but that angle can’t be adjusted. I doubt that’s a deal breaker for anyone though. The button arrangement on the control panel is very simple, and I assume this is because the printer only has a basic, monochrome display. I imagine if it included a full color LCD and allowed some degree of photo manipulation or correction, it would require a few more buttons. So if you feel intimidated by a lot of buttons, the X4550 might actually be a good choice. Personally though, I think the more the merrier.
On the left side of the control panel are the buttons for the 3 basic print modes including Copy, Scan and Photo. The Copy mode is pretty much run directly from the printer but the other two can be used in conjunction with your PC. And again, this is probably related to the printer’s basic display, which limits the on-board functionality. The other buttons are mostly used for changing settings and options or navigating through menus, and on the far right you’ll see the two buttons for starting a copy, scan or print in either black & white or color.
The power button is pretty straightforward as well, but I have found that simply clicking it once to power down the printer only puts it into a power-saving mode. While in this mode the power button slowly fades in and out, letting you know the printer isn’t completely off. So in order to actually shut down the printer you need to hold down the power button for 3 or 4 seconds. Unfortunately I couldn’t find a way to change this behavior in the settings.
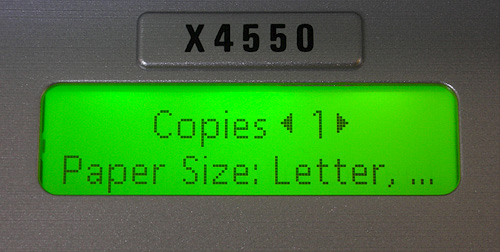
Here you can see a close-up of the aforementioned display which is pretty basic. I would definitely prefer if it could display a few more characters, as longer options or messages have to slowly scroll across the display which at times can be kind of annoying. I’m sure that not including a full color display was a cost-cutting measure, but I think having an extra line of text on this one would have helped a lot. Otherwise it’s more than functional.
I should also mention that Lexmark sells a higher-end version of this printer that does include a full color LCD display. So if that’s an important feature for you, the ‘advanced’ model might be the way to go.
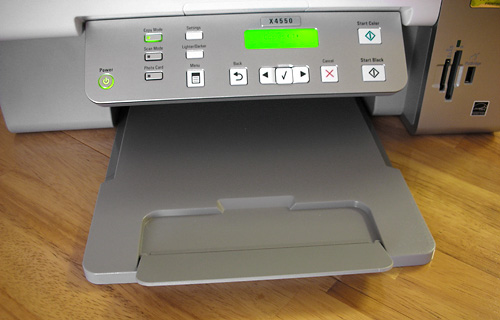
Underneath the control panel you’ll find the standard pull-out tray that’s used to catch your prints as they finish printing. There’s really not much else to note here, so let’s move along.
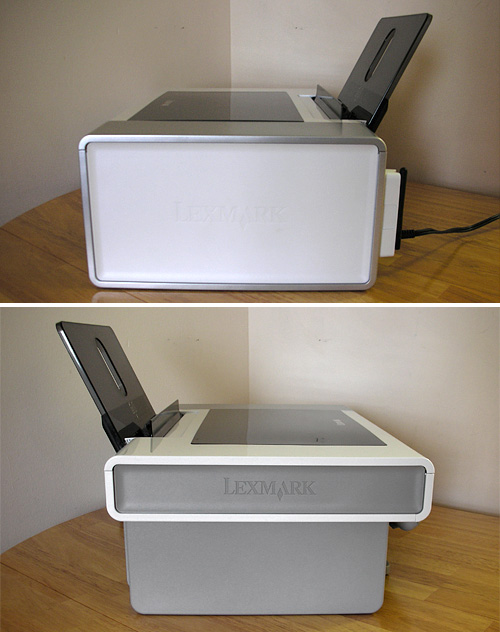
The sides of the printer aren’t that exciting either. They’re both clearly branded with the Lexmark logo, and the only reason I included photos of them was so you could piece together a crude 3D version of the printer using your imagination.
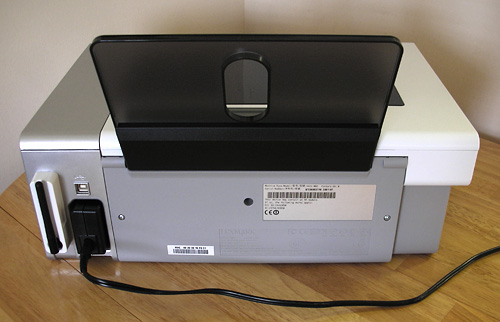
The back of the printer is also just as bland as one would expect, but there are a few interesting bits hiding back here.
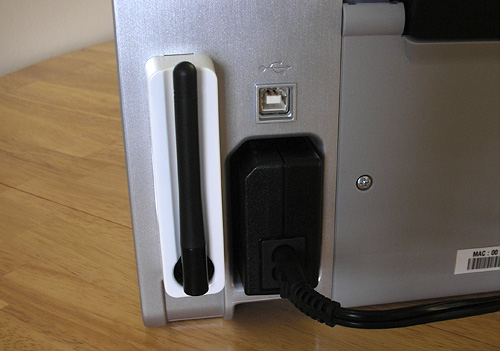
On the left side you’ll find a USB connection for those living without wifi, but it’s also needed when setting up the printer for the first time. More on that shortly. You’ll also find the power connection as well as the wifi antenna and hardware, which are actually both removable… and remove them I shall.
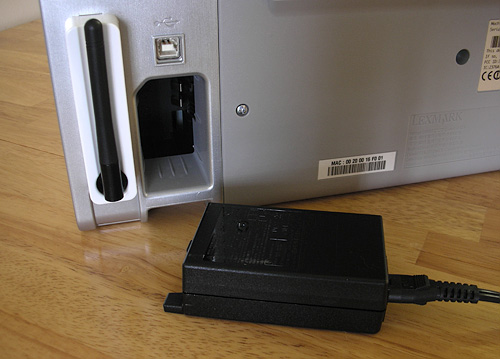
Instead of including a large brick-like power adapter somewhere along the middle of the power cord, on the X4550 it actually sits inside this small bay on the back of the printer. I hate dealing with those power bricks that usually end up sitting on the floor, and I’d much rather have a slightly larger printer that can hide them away inside. In theory it also means you can easily swap in a new power adapter if you’re moving to another country with different power standards.
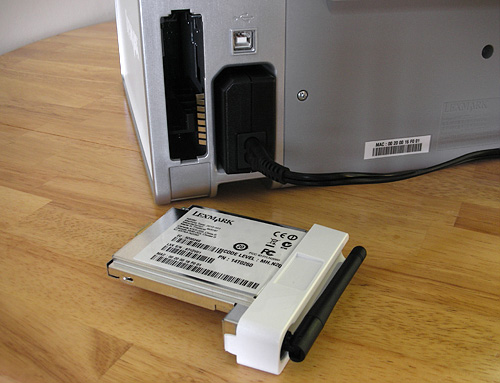
And like the power adapter, the wifi module can also be easily removed from the back of the printer. I can only assume that Lexmark sells a cheaper version of this unit that doesn’t include the wifi module, but being able to easily remove it also means it can be upgraded in the future. (It’s currently 802.11g compatible, but who knows what the future holds.) Odds are you’ll probably be upgrading the printer well before a new wireless standard becomes popular, but it’s nice to know the option is there.
Speaking of wifi, let’s look at the front of the printer again and the most important feature of the Lexmark X4550.
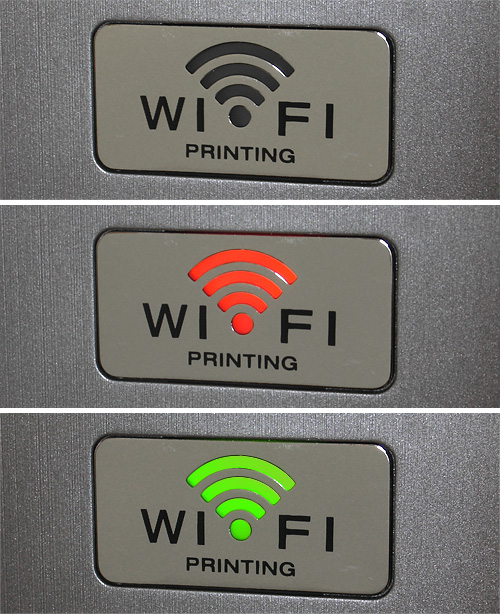
To the right of the previously discussed control panel is what appears to be just a wifi logo indicating this is a wireless model. But once you power on the printer you realize this logo actually serves as a status indicator. When wifi hasn’t been properly configured, or when the printer is in the process of connecting to your router, this logo will flash orange. (Even though it clearly looks red in the photo.)
And this brings me to one of the minor complaints I have about the printer. The initial setup actually requires it to be connected to your PC with a USB cable. Since this wasn’t mentioned in the instructions (or I somehow missed that step) I went ahead and set the printer up on a desk that was away from my computer. But as I was installing the Lexmark software, and got to the point where I had to setup the printer I then learned it needed to be connected to my system via USB. So basically I had to shut down the printer, unplug it and temporarily move it near my PC.
Ideally I would have preferred to see a system like my linksys wireless router uses, where the hardware can be accessed at all times via some special IP address, allowing me to configure settings and wifi codes without directly connecting to it. Now granted I don’t know if this is possible, or how much extra hardware the printer would need, but it would make things a lot more convenient. Even being able to enter my wifi code directly through the control panel would have been preferred. (As you can tell my lazy side was less than thrilled about having to move the printer once I had it setup.)
Once the wifi has been properly configured though, the wifi logo on the front of the printer will switch to a solid green color, letting you know everything is connected and working. Besides having to move the printer, the install and setup process was very easy.
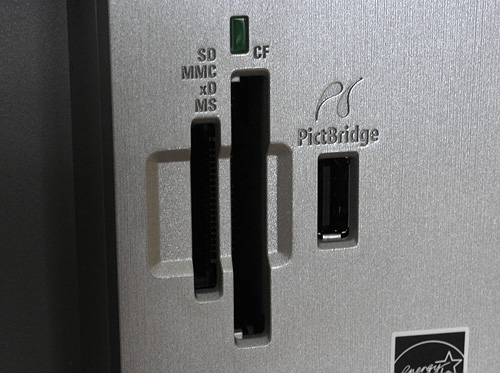
Just below the wifi indicator and to the right of the control panel is a series of slots for loading SD, MMC, xD, Memory Stick and Compact Flash cards. There’s also a USB port for connecting a PictBridge compatible digital camera or even a USB flash drive.
When you insert a memory card or flash drive, you have options for either printing photos directly from the printer, or with your PC. Since the X4550 is lacking a color LCD display, in order to print directly from the printer and select the correct photos it lets you print out a Proof Sheet that lists thumbnail versions of all the photos on the card. (You don’t have to print proofs for all the photos either, if you’re the type who rarely empties their memory cards.)
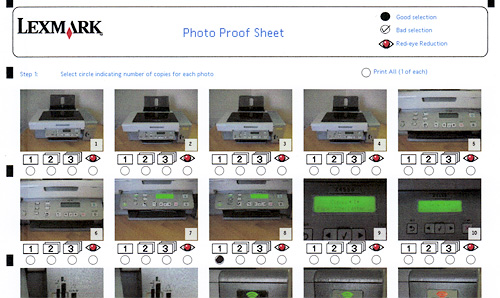
One thing I thought was particularly cool was that these proof sheets actually include a series of selection bubbles under each photo. They allow you to use a pen or pencil to manually select which photos are to be printed, how many of each and if they require red eye reduction. Once you’ve selected your desired photos you place that completed proof sheet onto the X4550’s scanner. The printer then scans the sheet and automagically recognizes all of your selections, printing out only the photos you’ve chosen. It’s definitely a clever way to fully utilize all the functionality in an all-in-one printer, and from my own testing it works very well.
If you choose the PC route however, you’ll have to use the printer’s control panel to select what computer on the network you’d like the printer to connect to. Once you’ve made your selection you’ll see the following option screen pop-up on your system.
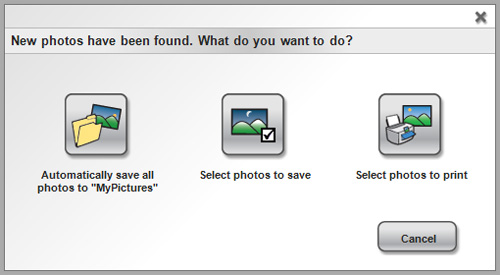
From here you can choose to save all the photos on the card to your computer, save only selected photos or select what photos you want to print. In this manner you can also think of the X4550 as a fairly large, wireless card reader. Clicking the print option brings up the following screen which allows you to ‘check’ any photos on the card you want printed.
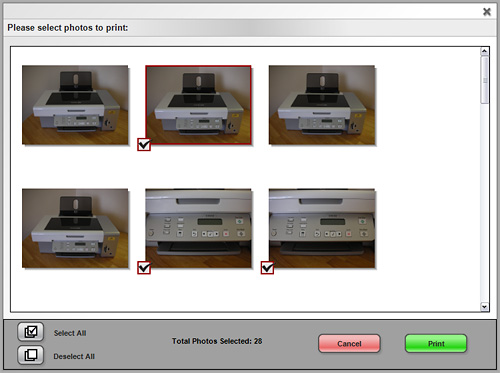
I’m only running an 802.11b network here, so it took quite a while to download the thumbnails for the 30 photos on the SD card I had inserted. I’m not sure if the delays were related to the speed of my network, the speed of the printer making thumbnails from the 7MP shots, or the speed of the SD card itself. But I imagine it would differ based on your own setup.
Once the thumbnails have all been loaded and you’ve selected your desired photos you just just hit the ‘Print’ button which then brings up the Lexmark Imaging Studio application.
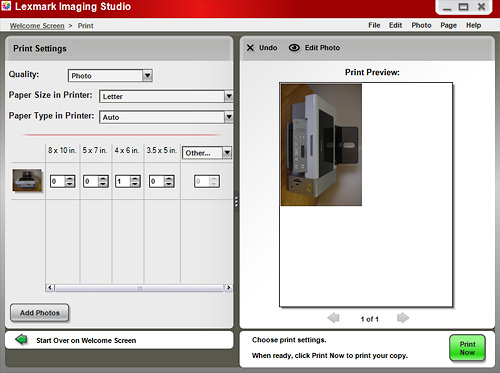
In here you’ll see a list of all the photos you’ve selected, allowing you to setup how many copies, or what sized prints you’d like for each one. It’s all very user-friendly but that also means the options are kind of limited. While there’s a good chance my parents would be able to use this, it might be lacking some advanced color tweaking options that professionals would need if they wanted to use the printer for creating proofs.
When it comes to actually printing, the Lexmark isn’t bad, but definitely isn’t at the top of its class either. I printed a full page color photograph on 8 1/2″ x 11″ glossy photo paper (which the printer automatically detected once I put it in the paper tray) and from the time I hit the ‘Print’ button to the completed page landing on the tray was 4 minutes and 40 seconds. And that’s with the highest quality settings. So the X4550 isn’t exactly the fastest printer on the market, but it doesn’t claim to be either. The quality of my printout wasn’t bad either. It wasn’t quite as vibrant or saturated as what I get from my default Epson, but I think most people (outside the print industry) would be more than happy with the results.
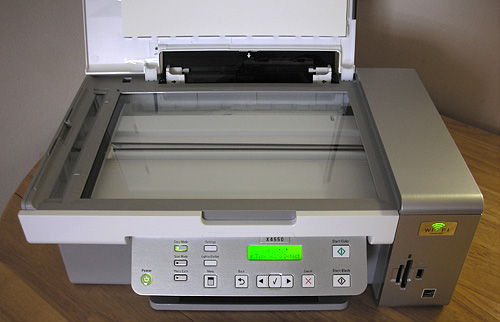
Like with most all-in-one printers, the scanner can be found on top and has a liftable lid with a white backing that completely covers the glass during a scan. One thing I did notice was that the lid can’t actually be removed, which is a feature I like on dedicated flatbed scanners. So scanning large books or other over-sized items with the X4550 could be problematic.
For example, being a true geek I decided to test the scanner with some Optimus Prime mint-in-box action. Mainly so today’s kids can actually see what Optimus Prime is supposed to look like. Because the box is long, the fact that the lid couldn’t be removed limited the ways I could place it on the scanner.
The actual scanning process is of course the one mode that requires a PC. Once you’ve got your document or item on the scanner bed, you switch the printer to the ‘Scan’ mode and then select what computer on the network you’d like to use it with. Once I selected my system the scanner automatically downloaded a list of all the scanner-compatible applications on my PC. This included obvious choices like Photoshop and Illustrator, but also Word, Excel, your default email client and a few other apps I probably wouldn’t think to use.
To then scan, you just hit the Black & White or Color Start button and once the scanning process is complete it will automatically be loaded as a new document into the application you chose.

Here’s the scan of the Optimus Prime packaging directly out of Photoshop with no processing done to it. I just scanned it in at 300 dpi (the scanner can go up to 600 dpi) cropped it to 500 pixels wide and saved it as a jpeg. While the jpeg step does mean the version you see is slightly less quality, I was completely satisfied with what I saw directly in Photoshop. Other than needing a bit of sharpening, it matches the colors on the original box pretty well.
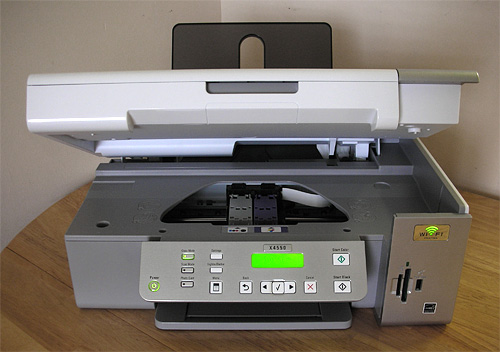
Lifting the scanner bed is how you gain access to the printer’s two ink cartridges, but as you can see in the photo that’s as high as the bed can be lifted. While you can still easily remove and install new cartridges, it does feel a little cramped under there. But unless you’re replacing ink cartridges on a daily basis, it’s not a big issue.
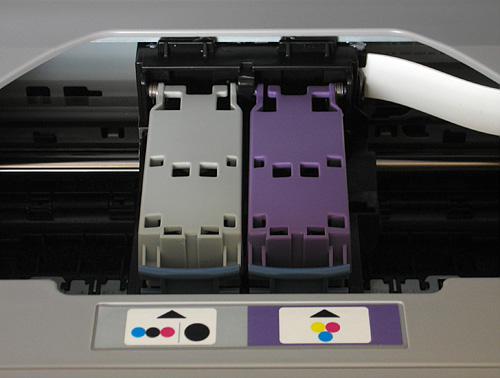
Actually installing or removing ink cartridges is pretty easy, but then again I don’t think there are any printer manufacturers going out of their way to make this process difficult. When the scanner bed has been lifted the carriages automatically slide over to the middle, allowing the individual compartments to be opened and the ink removed or swapped.
As for costs, a black ink cartridge directly from Lexmark runs $19.99, while a color cartridge runs $21.99. Obviously if you’re printing a lot of photographs the color cartridge is going to run out quicker, but the prices seem to be in line with what I see the other big manufacturers charging.
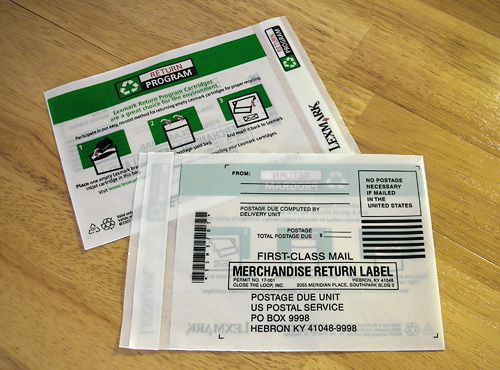
However, if you’re not keen on throwing empty ink cartridges in the trash there’s another reason you might want to consider a Lexmark printer. In addition to the 2 inkjet cartridges, the printer also included 2 small postage paid plastic bags. Basically once a cartridge runs out, instead of throwing it in the trash you stick it in this plastic bag, seal it shut and throw it in the mailbox. The cartridges are then returned to Lexmark where they get recycled. While the postage on the envelopes is already paid for, I can only assume it’s been rolled into the price of the ink cartridges. But while I probably wouldn’t recycle these if I had to pay for the stamp myself, I’ll gladly do it and pay a bit extra if the postage fee is included.
Conclusions
I’ll be quite honest that I’ve never really considered a Lexmark printer before, whether for my own uses, or when friends ask for a recommendation. But having just a few months ago helped someone else research a new all-in-one printer, I definitely feel that the X4550 is a good all-around performer in its class. Particularly when you factor in the price and the fact that wifi is included.
If you know someone with a digital camera but poor PC skills who wants to start printing their shots, the X4550’s ‘Proof Sheet’ functionality should make it easy for them. Especially if they’re already experienced with filling out order forms for 35mm film prints. It’s really a clever idea that takes advantage of the printer having a built-in scanner.
The wireless functionality of the X4550 makes it particularly suited for a small office or household where multiple computers need access to a printer or scanner. It eliminates the need for cables running all over the place, or laptops having to be moved within range of a USB connection.
In the end I’ll probably still stick with my Epson when it comes to printing proofs or other images that need to match what I see on my calibrated screen. But for general printing needs and just plain convenience, the X4550 is a welcome addition.
Pros:
+ Wireless! (Except for power.)
+ Can also serve as a wireless memory card reader.
+ Proof Sheet system for selecting photos to print off a memory card is very useful.
+ Easy to use ink cartridge recycling program.
+ Great price considering it also functions as a photocopier, scanner and has built in wifi.
Cons:
– The printer has to be connected to a PC via USB for the initial setup process.
– Full page photo quality printing is not exactly fast.
– No color LCD display for previewing photos.
– Scanner lid can’t be removed to accommodate larger documents.
– Wireless communication between the PC and printer can be slow at times.
– Uses a single, 3-color ink cartridge, instead of separate ones for each color.
Links:
Lexmark X4550 All-In-One Wireless Printer – $129.99
If you have any further questions or concerns about the Lexmark X4550 All-In-One Wireless Printer you’d like answered please feel free to leave them in the comments and I’ll try to respond to them as best I can.


